ราคาต่ำสุด
THB 0.00
พร้อมส่ง
SKU
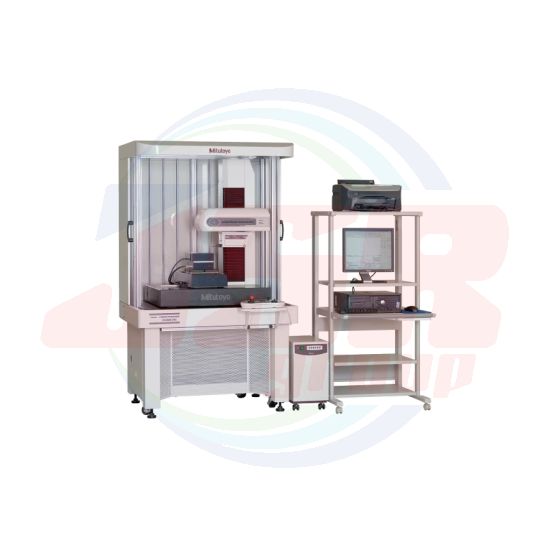
FORMTRACER Extreme
CNC Surface Texture Measuring System
FORMTRACER Extreme
CS-5000CNC / CS-H5000CNC
High-accuracy CNC surface measuring instrument that can support both surface roughness and contour evaluation in a single measurement.
Measuring range (X axis): 200 mm
Measuring range (Z1 axis): 12 mm /24 mm
CS-5000CNC/CS-H5000CNC
| Model | CS-5000CNC | CS-H5000CNC | ||||
| Column type | Standard column type | High column type | Standard column type | High column type | ||
| X1 axis (drive unit) | Measuring range | 200 mm | ||||
| Resolution | 0.005 μm | |||||
| Scale unit | Transmitted-type linear encoder | |||||
| Drive speed | CNC mode | Max. 40 mm/s | ||||
| Joystick control mode | 0 to 40 mm/s | |||||
| Measuring speed | 0.02 to 0.2 mm/s (surface roughness), 0.02 to 2 mm/s (form/contour) | |||||
| Measuring direction | Forward / backward | |||||
| Straightness | (with standard stylus) | (0.1+0.0015L) μm L: traverse length (mm) | (0.05+0.0003L) μm L: traverse length (mm) | |||
| (with 2X-long stylus) | (0.2+0.0015L) μm L: traverse length (mm) | (0.1+0.0015L) μm L: traverse length (mm) | ||||
| Accuracy (20 °C) | ±(0.3+0.002L) μm L: traverse length (mm) | ±(0.16+0.001L) μm L: traverse length (mm) | ||||
| α axis | Inclination angle | -45° (counterclockwise), +10° (clockwise) | − | |||
| Z1 axis (detector unit) | Measuring range | (with standard stylus) | 12 mm | |||
| (with 2X-long stylus) | 24 mm | |||||
| Resolution | (with standard stylus) | 0.0008 μm | ||||
| (with 2X-long stylus) | 0.0016 μm | |||||
| Vertical movement of the stylus | Arc motion | |||||
| Scale type | Transmitted-type linear encoder | |||||
| Accuracy (20 °C) | ±(0.3+|0.02H|) μm H: probing height (mm) | ±(0.07+|0.02H|) μm H: probing height (mm) | ||||
| Measuring force | (with standard stylus) | 4 mN (Fixed) | ||||
| (with 2X-long stylus) | 0.75 mN (Fixed) | |||||
| Traceable angle | Ascent: 60°, Descent: 60°, (Depends on the surface texture.) | |||||
| Stylus tip shape | Standard stylus | Tip radius: 5 μm, Tip angle: 40°, Diamond tip | ||||
| Standard ball stylus | Tip ball radius: 0.25 mm, Sapphire | |||||
| 2X-long stylus | Tip radius: 5 μm, Tip angle: 40°, Diamond tip | |||||
| 2X-long stylus | − | Tip radius: 2 μm, Tip angle: 60°, Diamond tip | ||||
| 2X-long ball stylus | Tip ball radius: 0.25 mm, Sapphire | |||||
| Face of stylus | Downward | |||||
| Z2 axis (column) | Travel range | 300 mm | 500 mm | 300 mm | 500 mm | |
| Resolution | 0.05 μm | |||||
| Scale type | Reflective-type linear encoder | |||||
| Drive speed | CNC mode | Max. 200 mm/s | ||||
| Joystick mode | 0 to 50 mm/s | |||||
| Base size (W×D) | 750×600 mm | |||||
| Base material | Granite | |||||
Note: While the appearance of the natural stone measuring table varies according to the source, the high stability for which this material is known can always be relied upon.
Y-axis table unit (for Y-axis installed model)
| Measuring range | 200 mm | |
| Minimum reading | 0.05 μm | |
| Scale unit | Reflective-type linear encoder | |
| Drive speed |
CNC mode | Max. 200 mm/s |
| Joystick control mode | 0 to 50 mm/s | |
| Maximum loading capacity | 20 kg (the center of gravity should be placed within 50 mm from the table center) |
|
| Straightness | 0.5 μm/200 mm | |
| Accuracy (20 °C, contour mode) | ±(2+2L / 100) μm L: Dimension between two measured points (mm) |
|
| Table size | 200×200 mm | |
| External dimensions (W×D×H) | 320×646×105 mm | |
| Mass | 35 kg | |
| แบรนด์สินค้า | MITUTOYO |
|---|
เขียนรีวิวสินค้าของคุณเอง


